Woventek Installation guide:
Subfloor preparation:
The floor needs to be clean, no cracks and oil and stains free, pressure resistant and well dried. Appropriate preparation of the subfloor is
essential for a good final result. The surface must be treated with a primer, followed by the application of a leveling compound. This compound
must grinded and vacuum cleaned. Take heed, depending on the construction of the floor, of the allowed residual humidity and possible rising
moisture. If necessary, apply a damp screen.
| Cutting tools |
Shovel, Carpenter's ink market, Tape measure Rule, Safety knife, Cutting knife |
| Cleaning tools |
Vacuum, Mop cloth, Shoe cover, Mop, Broom |
| Glue |
PVC glue, Henkel PVC glue,, Cold welding liquid |
Remarks:
More suggestion: A large cloth or thick paper prepared for the floor just installed; prevent the flooring from destroying by the traffic of
worker and machine.
Floor Preparation: Roll the Woventek carpet covering out, overlapping for about 5 cm and leave it for 24 hours to acclimatize. Always lay all
the rolls in the same direction. Avoid crosscut seams and use transition profiles if this cannot be done.
When laying several rolls in the same room, the rolls must be the same batch. To obtain the best results, 48 hours acclimatization is advised
and during installation the temperature should not be lower than 15 degrees Celsius and the relative humidity not higher than 80%.
Attention
The lengths are overlapped by approx. 5 cm and then double-cut in order to achieve a tight seam. Mark the location of the seam to facilitate the
next stage.
See figures 1 and 2 below. For the striped references such as as Barcode and Trucco series the overlap should be cut so that the stripes can
make the whole circle by the seam are as wide as the other stripes, about 7 cm.
Welding
Unnoticeable seams: two lengths over lapping and the surplus must be cut off. (about 5cm)

Figure 1
Adhesive application:The carpet is to be bonded to the entire surface using suggested glue. Certain glues cause plasticizer migration often
resulting in claims; these are not covered by our warranty. Respect the processing instructions of the manufacturer or contact your supplier.
Fold the lanes back over half of their length (or width) draw a line as start for the glue application. Lay the floor in the wet glue and rub
with a cork beam from the center to the edges to remove all air bubbles. It is important to close the seams very well. During the drying time of
the glue indoor conditions have to remain constant.
Welding of the seams:
It is necessary to weld the seams, we suggest to use cold welding glue, Woventek can supply this cold welding glue upon customer request.
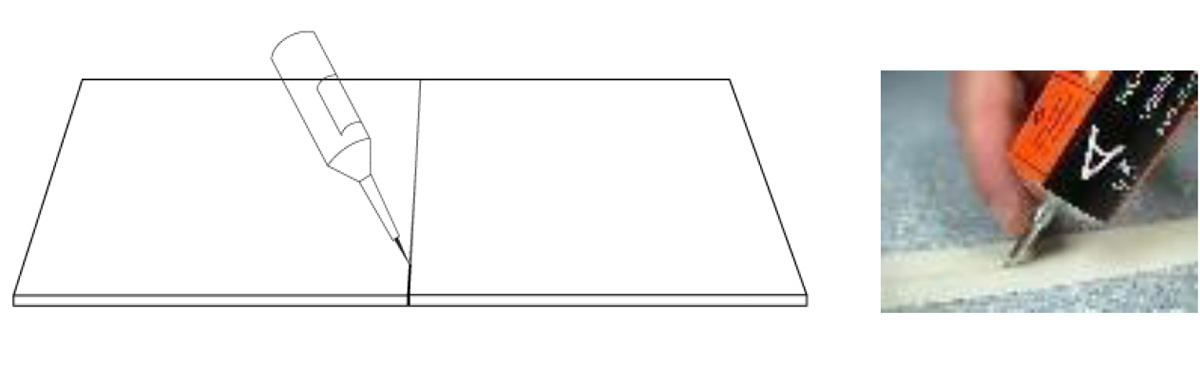
Figure 2
*Note: Please try in small area of the glue or cold welding liquid then apply bigger area.
Ambiguous
If the material is being installed on steps, moldings must be used.
Wheels on office chairs must be polyamide (hard type, designed for textile flooring).
Furniture must have Teflon, polythene, stainless steel or similar feet. Some improper furniture stand may cause indentation. See figure 3

Figure 3
Certain types of rubber found in wheels of trolleys, entrance mats, etc. can cause discoloration in the form of migration. This type of
discoloration cannot be removed.
Download Installation Instructions >>